
Another Eden Begins Boss Fight Strategies
When symbol encounters turn into story beats — how to win without a gacha safety net.
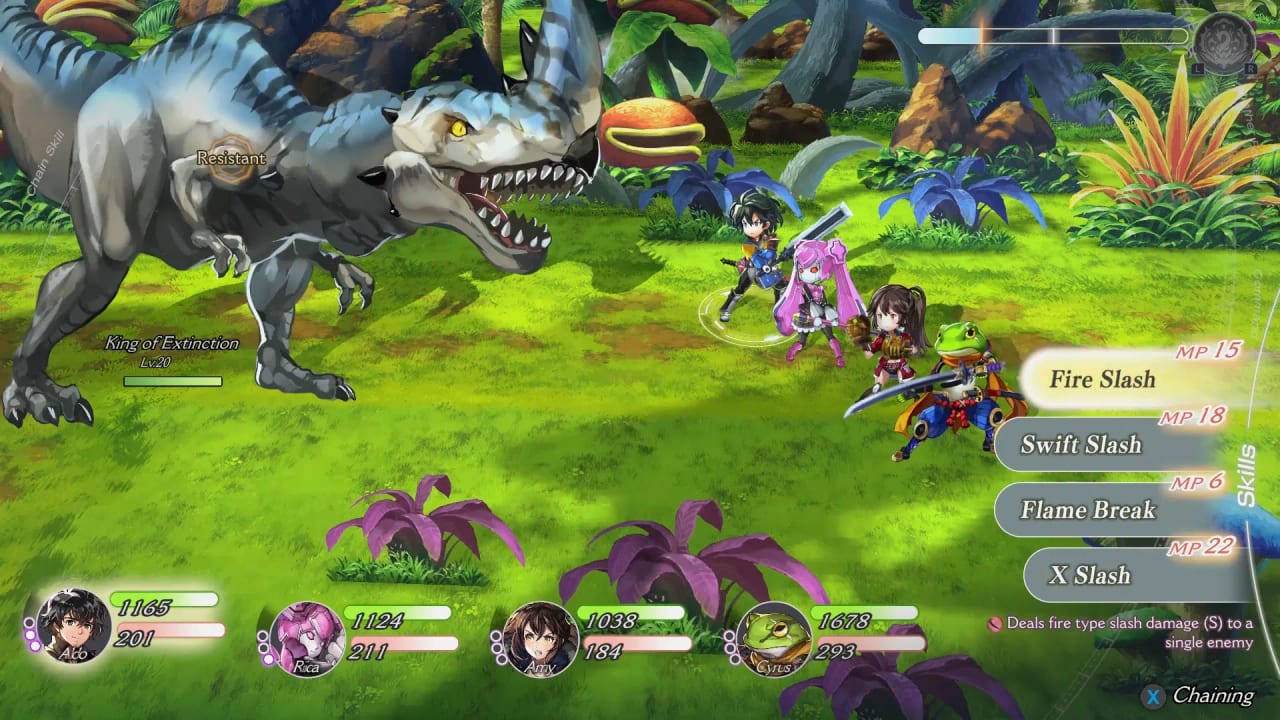
Not every fight in Another Eden Begins is a training dummy. Some encounters are storyMandatory: the Beast King in the Moonlight Forest, the fights that bracket the time jump, the battles inside Elzion that gate chapter progress. These are boss-level engagements. This page covers how to approach them with the tools the game actually gives you: a balanced party, chain skills, and the Another Force gauge.
The combat page explains the systems in full. This page applies those systems to fights that matter.
How bosses differ from regular encounters
Regular symbol encounters on the field can be steered around when the story allows. Boss fights load a fixed scenario: a named enemy or group with more HP, multiple phases or turns, and story consequences for losing. You cannot path around a boss. You need to win.
The demo’s chapter 1–6 scope means you will encounter at least one major boss fight before the time jump and several inside Elzion before chapter 6 ends. The exact sequence and enemy names inside the demo are not published in a walkthrough table; this page covers the approach, not the specific HP bars we do not have.
The three rules that matter in every boss fight
Rule 1: Another Force is a timing tool, not an emergency button.
The Another Force gauge fills as you attack. Activating it halts enemy actions and fires a barrage. In a boss fight, the halt is the valuable part. If you dump the gauge the moment it fills when the boss is about to execute a wipe move, you waste the freeze on a turn where you needed time to heal. If you save it for that wipe turn, you get the freeze and the damage. Read the boss’s pattern when you can; if you cannot, err toward saving Another Force for a turn where the enemy would kill a party member.
Rule 2: Keep one recovery option in the party at all times.
A healer, a shield, or a character whose command list includes revival. The party building page explains the three roles. A boss fight that runs long will punish a party that spent all four slots on damage. Mariel’s priest blurb is the clearest official healer signal; Bertrand’s Shield of Miglance title is the clearest mitigation signal. Use them.
Rule 3: Chain skills need setup, not just button presses.
Chain skills are successive strikes that depend on turn order and skill sequencing. A party of four attackers can still fail to trigger a chain if nobody sets the condition the second skill asks for. Watch the skill descriptions in the command menu. If a skill says it chains, build a turn that lets it chain. If it does not, do not wait for a wiki table that does not exist.
Approaching the Beast King fight
The Moonlight Forest encounter with the Beast King is the first major story gate inside the demo’s scope. Based on the official prologue and the well-known opening of Part 1, this fight is the narrative turning point that sends Aldo 800 years forward.
Practical approach:
- Build a party with at least one healer before entering the Moonlight Forest. The demo walkthrough describes the expected party state at that point.
- Do not rush to trigger Another Force on the first fill. Watch the Beast King’s turn pattern.
- If the boss winds up a heavy attack and your party HP is low, use Another Force to freeze the turn and recover instead of dumping it for damage.
- When in doubt, a surviving party is better than a spectacular wipe.
Phase transitions and boss patterns
Some bosses in this style of game have phase transitions: health thresholds that change the enemy’s move set or add new behaviours. Official Begin materials have not published phase tables. During a boss fight, watch for:
- A sudden change in attack pattern after you reduce the boss to a certain HP range.
- New enemy adds that spawn mid-fight.
- A boss that stops attacking and starts a multi-turn windup.
The windup is usually the moment to either trigger Another Force for the freeze, or stack defensive buffs before the next hit lands.
What the demo teaches you about boss fights
The six-chapter demo is a teaching tool. The boss encounters inside it are not brutal walls; they are extended tutorials. Use them to learn:
- When the enemy is about to execute a heavy attack (visual or audio tell).
- How quickly your party can fill Another Force with normal attacks.
- Which character in your current roster handles recovery most reliably.
The habits you build in those demo bosses are the habits you will need in the full game’s harder encounters after the credits and inside New Game+.
New Game+ and post-game bosses
When you reach New Game+ with your cleared-party strength, boss fights scale. The enemies do not reset to level 1; your party carries over. That means the boss encounters in a New Game+ run of chapter 1 will hit harder than a first-clear party of the same level would. Budget for mitigation and healing accordingly.
Sibling pages: combat, New Game+, party building, and party compositions. When you need the first-hour install path, return to Getting Started.
Frequently Asked Questions
Quick answers to the most common questions.
Can I avoid boss fights?
StoryMandatory bosses are not avoidable. Regular symbol encounters can be steered around when the story is not forcing a fixed encounter.
Should I use Another Force as soon as it fills?
In boss fights, save it for a turn where the enemy would kill a party member, or when a phase transition is about to occur. Dumping it immediately wastes the freeze.
What if I do not have a healer in my party?
Official role language is attackers, supporters, and healers. A party without recovery will fold in longer boss encounters. See party building.
Do bosses have phases?
Many bosses in this style have phase transitions. No official phase table for Begins bosses is public. Watch for changes in attack pattern after health thresholds.
Are New Game+ bosses harder?
Your party carries over with its strength, but the enemies scale. Budget for mitigation and healing even with a cleared-game roster.